Sellerie des Champs Downloads & Guides
Home=> Guides and Tutorials => Editing with Offaly => Hair Tutorial
Hair Tutorial
Tutorial using Photoshop CS and Intuos Tablet by Wacom


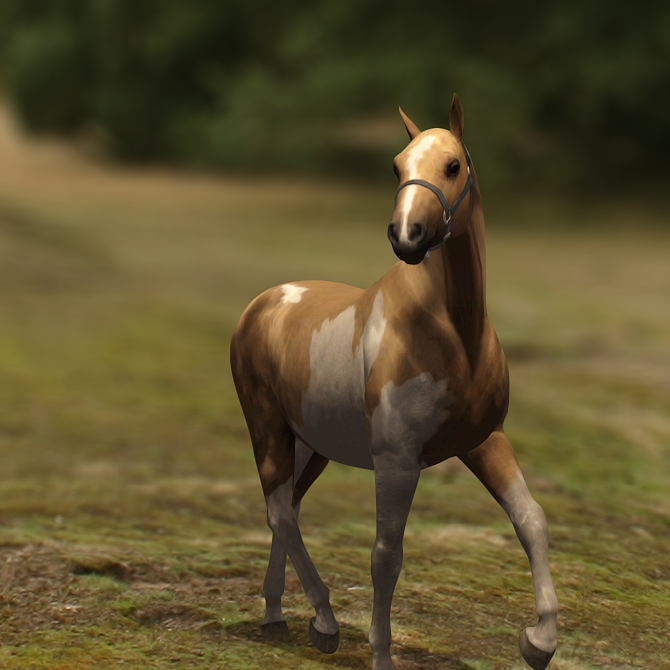
Note 1: This edit was done using a tablet with working pen pressure. If you are a mouse user or if your tablet pen pressure doesn't work, there will be differences.
Note 2: This type of hair editing requires a body painting on the horse (not done on this picture yet) or your final edit will not look right (inconsistency of editing is not something you want!).
Step 1: the Base

To make a good base, I start by making a new layer (shift+ctrl+N).
My personal preference is to make a rough outline (as seen on the right) before filling it in.
I choose a regular hard brush (as seen on the left) at about 5px. If you wish to make smaller strands for stray hairs, you can reduce the size (personally I use the brush at 3px to draw those)

Do not worry about it being super nice. This is just a general outline to help you plan your work better.
For the color, I choose the darkest tone of the tail. This will differ depending on the tail color obviously.

If you feel confident, you can do the filling of the base directly in the first layer but if like me, you don't want to risk hurting your outline, create a new layer.
I then select the brush seen on the right to do the biggest of the filling, but that's really a question of taste. If you prefer using a solid brush at all times, that is fine too.
As for size, that all

depends on how much "ground" you have to cover. I play with size a lot at this time of the edit.
Avoid going too close to the points of the hair as you want those to be solid.
Talking of points, it is time to finish the base. Here I make another layer and then, selecting the hard round brush at 5px, I start filling in the holes, and fix the general shape of the base. When it is done, I merge my 3 layers together (ctrl+e), So that I can move my base if needed.
Always remember to take the breed of your horse, the gait and the elements (like wind) into account.
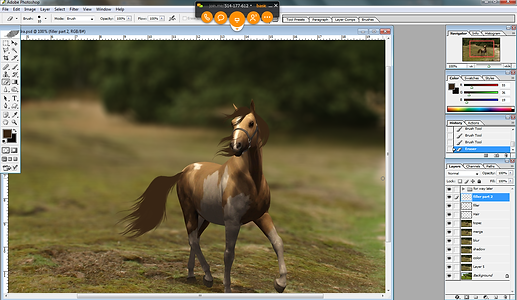


Here I didn't like the way the tail stuck out too much to the side (it's important to think of your angles when drawing), so I moved it. At this time, I like to erase the parts that stick out, but you can also wait after step 2, if you prefer.

It is sometimes hard to see if there are holes in your base with the regular background, and having a solid a base is rather important. My tip is to hide all background layers so that the hair appears like on the left here. As you can see there are some inconsistencies in the filling here. Using the same hard brush fill all little holes.

At this time, if you (like me here) realize the color for the base is wrong, change the color. Here it was too dark for my palomino tobiano pony. To fix it, I picked one of the lighest hues on my pony's coat, made a new layer and clipped it to my base (ctrl+g). Then I made my brush really big and went over the whole thing. Once that was done, I merge the two layers together. Do not worry if the color is not exactly right as you can always make some more modifications later.
And there you have it, Step 1 is done!
Step 2: the Body Work


Step 2 is very simple. All it is about is to create hair texture by doing several clipped layers of hair strands. Because our base is the darkest color, all our strands are going to be lighter. For this particular tail I made 4 strand layers each lighter than the next (you can see my palette on the left - sorry 3rd color is missing but you get the idea). When it comes to the brush, I'm still using the same hard round brush. The first 2 layers of strands are done at 3px and the last 2 at 2px.


Apply strands uniformly over the entire base. Do not worry about where lights and darks are going to be, simply make sure you are shaping the hair (so if you have locks of hair that are going to cross above others - like i do in the forelock - this is where you make them appear). This step is only about texture, not about shading!
(I put the build up of each new layer in the gallery above so you can see how it adds up)
And with that step 2 is all done.
Don't feel bad if it doesn't look very good... I think this is where the hair looks its worst personally, so it's totally normal. Do not judge your work before step 3 as shading changes everything!
If you haven't done it before, this is the time to erase the parts that shouldn't be there.
Step 3: the Shading

Step 3 is by far my favorite, as it is here that the hair comes to life! The process might be a little bit scary, but do not worry, it will look good at the end!
On a new clipped layer, still using the same hard round brush, at about 7px this time, and picking a color that is darker than the base (here I chose a brown, but color will vary depending on your tail), make little strokes where you imagine your shadows will be.
You want to make both general shadows (that will be areas with a high concentration of strokes) and some lock of hair shadows (those will be more dispersed and are here to give the idea of 3D).
As you can see on the left, it looks pretty horrifying!
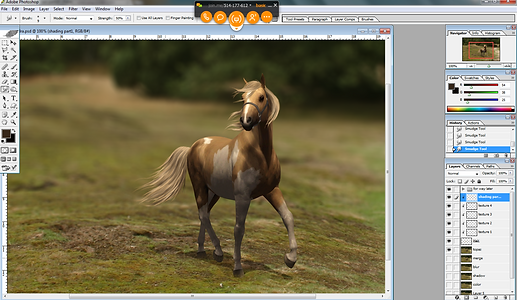
Select the smudge tool, making sure the brush is a soft round brush and gently smudge those shadow strokes following their natural direction until they look like they are blending in with the texture from earlier. My brush was at 9px for the most part, but you can make it bigger for the general shadows and smaller on the little strands. Make sure your shadows are defining the movement and the layout of the light in your hair. Once you are done, you can reduce the opacity of the layer (I didn't do it right away here, but shading layers in "normal" mode should never be full opacity or they will hide all the pretty work you did underneath.)
Put the Shadow layer opacity at 80%.
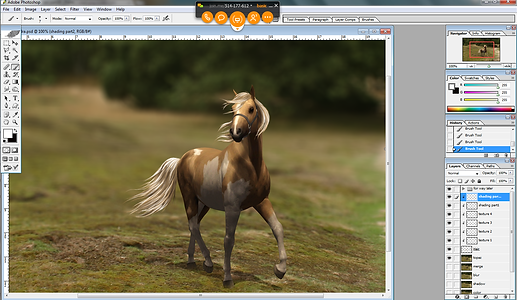
Repeat the exact same process from above on a new clipped layer, with the lightest color. Here because my hair is light (it is supposed to be almost white), I chose a pure white, but do not use that for tails other than "white" or light grey ones. If you are doing a black tail for example, use a grey that is lighter than those you used in step two (but still dark enough to make sense). If you are doing a chestnut, use an orange that is lighter than lightest spot in the horse's coat while still retaining most of the saturation (you don't want to go too much towards the white as it would dull out your hair).

Same as for the shadows, smudge it all until it blends in naturally.

Where the highlights differ from the shadows is at the moment of opacity. Once your smudging is nice and good like above, you want to duplicate that highlight layer. Reduce the opacity of the copy dramatically (here I put it at 30%, but it differs from picture to picture... mine is usually between 20% and 40%). Once that is done, click on the original highlight layer and change the mode from "normal" to "soft light". If your highlight layer was white, you have nothing more to do, if however it is any other color, you are going to want to lighten it a bunch (open image=>adjustment=>hue/saturation and then bring the light way up but not quite to completely white). Light colors used in a soft light mode do not hide anything underneath but actually saturate it, giving that beautiful shine effect.
Normally, if you have done everything correctly, your hair is now finished!
Of course, I wasn't quite satisfied so I did a little more tweaking to mine.

Although the color from above was pretty, I wanted my hair to be a tiny bit more white, so I added another clipped layer, set it to "soft light" and then using pure white, I went over my entire hair. I then reduced to 40% opacity and tada!!

Finally I decided to boost my shadows and highlights a bit by adding 2 more layers at very low opacity.
This is not something I normally do, so I suppose those 2 extras are more of an exceptional occurance than actual part of my tutorial.
And with that, step 3 - and the hair itself is done!!
From Beginning to End Gallery: